Tie dye patterns in fashion and creativity have made a remarkable comeback. From t-shirts to socks, pillowcases to canvases, the colorful, psychedelic tie-dye designs have taken over Instagram feeds and fashion runways. The charm of tie-dye lies in its uniqueness – each creation is one-of-a-kind. But how can you achieve those Instagram-worthy tie-dye patterns at home? We’ve got you covered. In this comprehensive guide, we will walk you through the steps to create stunning tie-dye designs that are not only easy but also guaranteed to get your Instagram followers double-tapping.
Gather Your Materials for Creating Tie Dye Patterns
Before we dive into the exciting world of tie-dye, let’s ensure you have everything you need for the perfect DIY tie-dye project. Here’s a list of materials:
- White Garments for Your Tie Dye Patterns: Start with white cotton t-shirts, socks, or any fabric you want to tie-dye. The white canvas allows the tie-dye patterns to pop vibrantly.
- Tie-Dye Kit for Vibrant Tie Dye Patterns: Invest in a high-quality tie-dye kit that includes a variety of colors in squeeze bottles, rubber bands, gloves, and step-by-step instructions.
- Plastic Bags for Protecting Your Tie Dye Patterns: To wrap your dyed garments in while they set and prevent any accidental smudging.
- Plastic Bottles for Mixing Dye Colors: For mixing your dye colors if they’re not provided in pre-filled bottles, ensuring you have full control over the tie-dye patterns.
- Rubber Bands for Creating Unique Tie Dye Patterns: To bind your fabric and create different patterns using various tying techniques.
- Plastic Table Covers to Keep Your Workspace Clean: To protect your workspace from dye splatters, ensuring your surroundings remain stain-free.
- Bucket or Sink for Rinsing and Washing Your Tie Dye Patterns: An essential component for the tie-dye process, as it helps set your tie-dye patterns in place.
Now that you have your materials ready, let’s get started on your journey to Instagram-worthy tie-dye patterns.
Preparing Your Workspace for Tie Dye Patterns
- Cover Your Workspace: Lay down the plastic table cover to protect your work surface. Tie-dye can get messy, so this step is crucial for maintaining a clean workspace.
- Pre-Wash Your Garments for Enhanced Tie Dye Patterns: To ensure the dye adheres well and tie-dye patterns are vibrant, give your white garments a quick pre-wash and leave them slightly damp.
- Set Up Your Dye Station for Perfect Tie Dye Patterns: Organize your tie-dye kit, bottles, rubber bands, and plastic bags within easy reach, ensuring that your dye station is efficient and accessible.
Choosing Your Tie-Dye Technique for Unique Tie Dye Patterns
There are various tie-dye techniques to achieve different patterns. Here are some popular ones:
1. Spiral Technique for Mesmerizing Tie Dye Patterns
The spiral is a classic and much-loved tie-dye pattern. To create it:
- Lay your garment flat.
- Pinch the fabric in the center and twist it in a clockwise or counterclockwise direction.
- Secure the twisted fabric with rubber bands, forming a spiral.
- Apply different colors to each section of the spiral for a vibrant and captivating effect.
2. Crumple Technique for Textured Tie Dye Patterns
For a unique and textured look, try the crumple technique:
- Crumple your garment into a compact bundle.
- Secure it with rubber bands in random places, creating tie-dye patterns with an artistic touch.
- Apply your chosen dye colors to the different sections for mesmerizing tie-dye patterns.
3. Stripe Technique for Orderly Tie Dye Patterns
If you prefer a more organized look, opt for stripes:
- Fold your garment like an accordion, creating even sections.
- Apply your chosen dye colors to each section, alternating between colors to achieve neat tie-dye patterns.
Applying the Dye for Vibrant Tie Dye Patterns
Now that you’ve chosen your technique, it’s time to apply the dye for the perfect tie-dye patterns:
- Put on your gloves to protect your hands.
- Squeeze your dye colors onto the fabric, making sure the dye penetrates thoroughly, ensuring vibrant tie-dye patterns.
- Flip the garment and repeat the process on the other side, creating tie-dye patterns that are visually appealing.
- Make sure you saturate the fabric, but don’t overdo it to prevent colors from bleeding too much and maintaining the integrity of your tie-dye patterns.
Setting the Dye for Long-Lasting Tie Dye Patterns
Once you’ve applied the dye, it’s crucial to set the colors for long-lasting and vibrant tie-dye patterns:
- Place your dyed garment in a plastic bag.
- Seal the bag and let it sit for at least 6-8 hours. You can leave it overnight for best results, ensuring your tie-dye patterns remain vivid and impressive.
Rinsing and Revealing Your Tie Dye Patterns
After the waiting period, it’s time to unveil your masterpiece and reveal your tie-dye patterns:
- Remove the garment from the plastic bag, eagerly anticipating the unveiling of your tie-dye patterns.
- Rinse it under cold water until the water runs clear. This will remove excess dye and reveal the true beauty of your tie-dye patterns.
- Remove the rubber bands and unfold your fabric to reveal the vibrant tie-dye patterns that you’ve created with precision and care.
Washing and Drying Your Tie Dye Patterns
- Wash your tie-dyed garment separately in cold water with a mild detergent, preserving the integrity of your tie-dye patterns.
- Dry it according to the fabric’s care instructions, ensuring your tie-dye patterns remain as captivating as ever.
Now, you’re ready to showcase your Instagram-worthy tie-dye patterns to the world. The unique patterns and vibrant colors are sure to catch the eye of your followers and gain you those double-taps. Embrace the creativity and artistry of tie-dye and wear your handmade tie-dye patterns with pride!
Experimenting with Advanced Tie-Dye Techniques for Truly Unique Patterns
For those looking to take their tie-dye skills to the next level and create truly unique patterns, there are advanced techniques worth exploring. These methods can add depth, complexity, and a touch of sophistication to your tie-dye creations.
1. Ice Dyeing for Ethereal and Intricate Patterns
Ice dyeing is a fascinating technique that yields intricate, ethereal patterns. To experiment with this advanced method:
- Prepare your pre-washed garment as usual.
- Elevate the garment on a wire rack or a grid to allow for airflow underneath.
- Cover the garment with ice, creating a cold barrier.
- Sprinkle powdered dye over the ice, allowing it to melt and flow through the fabric.
- As the ice melts and the dye penetrates, it creates stunning and unpredictable patterns, resulting in a masterpiece of tie-dye artistry.
2. Shibori Tie-Dye for Artistic and Structured Patterns
Shibori is a Japanese tie-dye technique known for its structured and artistic patterns. To explore this method:
- Fold, twist, or bind your garment using various Shibori techniques, such as Arashi, Itajime, or Kanoko.
- Apply your dye in your chosen colors, and the binding or folding will create intricate and structured patterns.
- Rinse and reveal your Shibori tie-dye masterpiece, with each fold and bind contributing to the overall design.
3. Ombre Tie-Dye for Gradient and Subtle Patterns
Ombre tie-dye is all about creating gradual color transitions and subtle patterns. To achieve this stylish effect:
- Choose one base color and mix it with water to create a lighter shade.
- Dip your garment in the dye mixture, allowing it to soak and achieve a gradient effect.
- Remove and rinse the garment to reveal a subtle and stylish ombre tie-dye pattern.
By experimenting with these advanced tie-dye techniques, you can take your tie-dye artistry to a whole new level, creating one-of-a-kind patterns that will leave your audience in awe. Remember, practice makes perfect, and with each attempt, your tie-dye patterns will become even more exceptional.
Maintaining Your Tie-Dye Creations for Longevity
To ensure your tie-dye patterns retain their vibrancy and longevity, follow these essential tips:
- Wash with Care: Always wash your tie-dyed garments separately in cold water to prevent color bleeding. Using a mild detergent will help maintain the tie-dye patterns.
- Avoid Direct Sunlight: To prevent fading, store your tie-dye creations away from direct sunlight when not in use.
- Hand Washing Preferred: While machine washing is possible, hand washing is gentler on tie-dye patterns.
- Enjoy Your Masterpieces: Wear your tie-dye creations with pride and showcase your unique patterns to the world.

In conclusion, tie-dye patterns are a fantastic way to express your creativity and style. Whether you’re a beginner or an advanced tie-dye enthusiast, there’s always room for experimentation and artistic expression. With the right techniques and a bit of practice, you can achieve Instagram-worthy tie-dye patterns that will make your fashion and art stand out.
So, why wait? Grab your tie-dye kit, select your favorite techniques, and start creating those mesmerizing and unique tie-dye patterns that will have your followers hitting that double-tap on Instagram.
For an art enthusiast like you, we have another story on Tattoos.
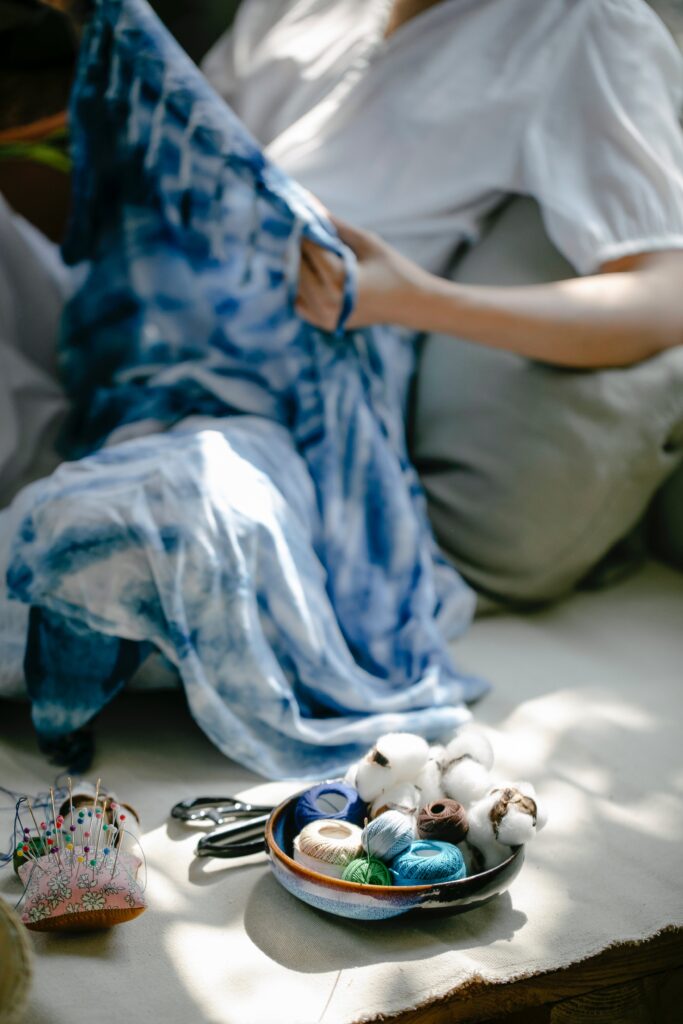
Photo by Teona Swift, Teona Swift